Why Do We Need Cinemachine?
A good camera makes a game feel good. A bad camera makes a game feel bad — even if everything else is great.
A few years ago, making a good camera was hard work. You had to write your own script for smooth following. You had to write code to stop the camera from clipping into walls. You had to write code for camera shake. This took time, and it was easy to get wrong.
Today, Unity gives us a free package called Cinemachine. It does all of this for you, with almost no code. In a few minutes, you can build a camera that follows your player, keeps them nicely framed, and even avoids walls.
In this lesson, you will:
- Install Cinemachine.
- Learn how it really works (the parts, and how they connect).
- Build a smooth follow camera step by step.
- Learn the most useful camera settings, each with a real example.
- Get a bonus: turn everything you learned into a full third-person character, using my free Third Person Controller package.
Quick Words to Know
Before we start, here are a few words we will use a lot. Keep this list nearby.
- Target — the object the camera follows or looks at (usually your player).
- Follow — “where should the camera stay?” (its position).
- Look At — “where should the camera point?” (its rotation).
- Damping — how smoothly the camera catches up. Low damping = snappy. High damping = slow and heavy.
- Blend — a smooth transition from one camera to another.
- Priority — a number that decides which camera is active right now. Higher number wins.
What Is Cinemachine, Really?
This part is important, so read it slowly.
Cinemachine is made of two main pieces that work together:
- CinemachineCamera — this is the “brain” that decides where the camera should be and where it should look. But it does not draw anything on your screen.
- CinemachineBrain — this is a small component you add to your real Unity Camera. It watches all your CinemachineCamera objects, and every frame it says “copy this camera’s position and rotation onto the real Camera.”
So remember this simple rule:
Cinemachine does not render your game. Only the real Camera renders. Cinemachine just tells the Camera where to go and where to look.
Here is an easy way to picture it. Think of a movie set. The CinemachineCamera is like a camera operator — they choose where to stand and where to point. The real Camera component is like the actual film camera — it is the only thing that captures the picture you see. The CinemachineBrain is the director, telling the camera operator which shot to use right now.
You can have many CinemachineCamera objects in one scene — one for normal gameplay, one for a boss fight, one for a cutscene. Only one real Camera is ever needed. The Brain switches between your CinemachineCameras and blends smoothly between them.
Step 1: Install Cinemachine
- Go to Window > Package Manager.
- Make sure the Unity Registry tab is selected (not “My Assets” or “Built-in”).
- Search for Cinemachine.
- Click it, then click Install.
That’s it. No extra setup needed.
Step 2: Build Your First Follow Camera
Let’s build a real camera together. You can use any object for this — a cube, a capsule, or your player character. The steps are the same.
- In the Hierarchy, create an empty GameObject and add a CinemachineCamera component to it (or use the Cinemachine menu if your Unity version shows one).
- Look at your Main Camera in the Hierarchy. If it does not already have a CinemachineBrain component, Cinemachine will show a warning: “Add a CinemachineBrain to this camera.” Click the button to add it. Without this, nothing will move — the CinemachineCamera will be planning shots, but no real Camera will be listening.
- Select your CinemachineCamera. In the Inspector, find the Tracking Target field. Drag your player (or test object) into it. This tells Cinemachine, “this is the object I care about.”
A useful trick: instead of tracking your player’s exact center, create an empty child object above their head or shoulders, and name it something like camera-target. Then drag that into the Tracking Target field. This gives you a clean point to aim at, and it is easy to move or rotate later without touching the player model itself. Watch how this looks in practice below.
- Now set a Position Control and a Rotation Control. For your very first test, try Position Control: Follow and Rotation Control: Hard Look At. Press Play and move your object around — the camera should now follow it.
One of the best things about Cinemachine: you can change these settings while the game is running, and if “Save During Play” is turned on, your changes stay after you stop. This makes tuning your camera fast and fun — no need to guess, stop, edit, and press play again and again.
Step 3: Position Control — “Where Should the Camera Be?”
The Position Control decides where the camera sits in the world, relative to your target. Cinemachine gives you several ready-made options. Here is what each one does, with an example so it’s easy to picture.
- None — the camera does not move on its own. Use this when you want to move the camera yourself with a script, or with animation.
- Follow — the camera keeps a fixed distance and angle from the target, with smooth damping. Example: a simple chase camera behind a car in a racing game.
- Orbital Follow — the camera circles around the target, and can react to player input (like moving the mouse). Example: a third-person action game, where the player can orbit the camera around their character while walking.
- Third Person Follow — the camera pivots around the target from over the shoulder, matching the target’s own rotation. Example: a third-person shooter, where the camera sits just behind and above the character’s shoulder.
- Position Composer — the camera keeps the target at a fixed spot on the screen, not just in 3D space. Example: a 2D platformer or a side-scrolling game, where you always want your character positioned slightly left of center.
- Hard Lock to Target — the camera uses the exact same position as the target, no smoothing at all. Example: a cockpit camera glued inside a spaceship.
- Spline Dolly — the camera moves along a path (a Spline) that you draw in the scene. Example: a cutscene camera that glides past your character along a fixed rail, like in a movie.
🧪 Try it: Set Position Control to Follow, then slowly increase the Damping values. Watch how the camera goes from snappy and stiff, to slow and floaty. There is no “correct” number — it depends on the feeling you want for your game.
Step 4: Rotation Control — “Where Should the Camera Look?”
The Rotation Control decides how the camera turns to point at (or near) your target. Here are the main options.
- None — no automatic rotation. Good if you are rotating the camera yourself in a script, or by parenting it to another object.
- Rotation Composer — smoothly keeps the target inside a framed area of the screen, using a Dead Zone (where the camera does not react at all) and a Soft Zone (where the camera slowly catches up). Example: a platformer camera that stays mostly still while your character jumps a little, but follows once they move far enough.
- Hard Look At — instantly points straight at the target, with no smoothing. Example: a security camera or turret that snaps to look at a target the instant it appears.
- Pan Tilt — rotates the camera based on player input, on a horizontal (pan) and vertical (tilt) axis. Example: a first-person camera, or a third-person “mouse look” camera where the player controls where the camera faces.
- Rotate With Follow Target — the camera copies the exact rotation of the target. Example: a cockpit view again — as the ship banks left, the camera banks left with it.
Step 5: Give Your Camera Some Personality — Noise
Under the CinemachineCamera settings, you will find a Noise option. Add a Basic Multi Channel Perlin component here to simulate camera shake.
Example: use a light “Handheld” noise profile to make your camera feel like a real person is holding it, or crank up the amplitude for a short burst when an explosion happens nearby.
You don’t need this for every camera. It’s a small detail, but small details are often what make a game feel alive.
Step 6: Extensions — Give Your Camera Superpowers
Extensions add extra behavior on top of everything else. You can add more than one. Here are two of the most useful ones for beginners.
- Cinemachine Deoccluder — stops the camera from getting blocked by walls or objects. When something (on a layer or tag you choose) gets between the camera and the target, the Deoccluder pushes the camera forward so you can still see your target. Example: your character walks behind a pillar — instead of the camera clipping through the pillar, it slides around it so you never lose sight of your character. You can also set an Ignore Tag so the Deoccluder does not react to your own player’s collider.
- Cinemachine Confiner 2D — keeps the camera inside a boundary you draw, so players never see the empty “void” outside your level. Example: a top-down or 2D game, where you don’t want the camera to show the edge of your world.
There are more extensions to explore later, like Impulse (for camera shake triggered by game events, such as a hit or an explosion) and Target Group (which keeps several objects in view at once — handy for local co-op or a boss fight where you want the boss and the player both visible).
Step 7: Many Cameras, One Scene — Priority and Blending
You are not limited to one CinemachineCamera. A real project usually has several — one for normal play, one for aiming, one for a cutscene, and so on.
Each CinemachineCamera has a Priority number. The CinemachineBrain always activates whichever CinemachineCamera has the highest priority. When the active camera changes, the Brain automatically blends between the two — smoothly moving and rotating from the old camera’s view to the new one, instead of snapping instantly.
Example: your gameplay camera has Priority 10. When the player enters a cutscene trigger, you enable a second CinemachineCamera with Priority 20. The Brain instantly switches to it, blending smoothly, and plays your cutscene shot. When the cutscene ends, you disable it, and the Brain blends back down to Priority 10.
You control the blend speed and style on the CinemachineBrain component itself, under “Default Blend.”
Quick Recap
| Setting | Question it answers | Good for |
|---|---|---|
| Follow | Where should the camera be? | Chase cams, general following |
| Orbital Follow | Can the camera circle the target? | Third-person action |
| Third Person Follow | Over-the-shoulder position | Third-person shooters |
| Position Composer | Fixed screen-space position | 2D, platformers |
| Rotation Composer | Smooth framing with dead zone | Most gameplay cameras |
| Hard Look At | Instant look, no smoothing | Turrets, security cams |
| Pan Tilt | Player-controlled look direction | First-person, mouse look |
| Deoccluder | Avoid getting blocked by walls | Any 3D game |
| Confiner 2D | Stay inside level bounds | Top-down, 2D games |
That covers the core of Cinemachine. With just what you learned above, you can already build follow cameras, cutscene cameras, and top-down cameras for almost any kind of game.
Bonus: Turn This Into a Full Third-Person Character
Now let’s use everything you just learned, and speed things up with my free Third Person Controller package. This gives you a ready-made third-person character, using the Orbital Follow and Third Person Follow ideas from above, in just a few clicks.
1. Install the Package
- Go to Window > Package Manager.
- Click the + icon in the top-left corner, then choose Install package from git URL.
- Paste this URL:
https://github.com/syed-suleman-shah-engineer/Reusable-Unity-Scripts-Packages.git?path=Assets/WitShells/ThirdPersonControl
- Once it’s installed, open the Samples tab for the package and import the samples too. You will need them later for animations.
This package can turn almost any 3D humanoid character into a fully working third-person character, with camera controls already built in.
2. Get a 3D Character
You need a 3D character (an “avatar”) to control. The fastest way to get one for free is Mixamo.
- Go to
https://www.mixamo.com/and log in. - Open the Characters section and pick one you like.
- Click Download.
- In the download options, choose Format: FBX for Unity, and Pose: T-pose.
- Download the file.
3. Set Up the Character in Unity
- Drag the downloaded file into your Unity Assets folder.
- Select it, and in the Inspector, go to the Rig tab. Change Animation Type to Humanoid. Unity’s animation system expects a standard humanoid skeleton — arms, legs, spine, and so on, all mapped in a common way. Setting this to Humanoid tells Unity “map this character’s bones to that standard skeleton,” so any humanoid animation (walking, running, jumping) will work correctly on it.
- Click Apply.
- Go to the Materials tab, and click Extract Textures, then Extract Materials. This pulls the textures and materials out of the imported file and turns them into normal, editable Unity assets. Without this step, your character can look dull or missing colors.
Your character is now ready to use.
4. One-Click Third-Person Setup
Drag your character into the scene. Then:
- Select the character in the Hierarchy.
- In the top menu bar, click WitShells.
- Click Setup Third Person Controller.
This one click does most of the work for you. It adds the needed components to your character, and creates a ThirdPersonSetup GameObject in your scene, which contains a ThirdPersonCamera object — a CinemachineCamera already configured with Orbital Follow and Third Person Follow settings, similar to what we built by hand earlier in this lesson. If your character does not already have a camera-target child object (the trick we learned in Step 2), the package creates one for you automatically.
5. Add Animations
The samples you imported earlier include ready-made animations, plus an Animator Controller called LocoMotion.
- In your Project window, open the samples folder for the package, then the Third Person Demo folder.
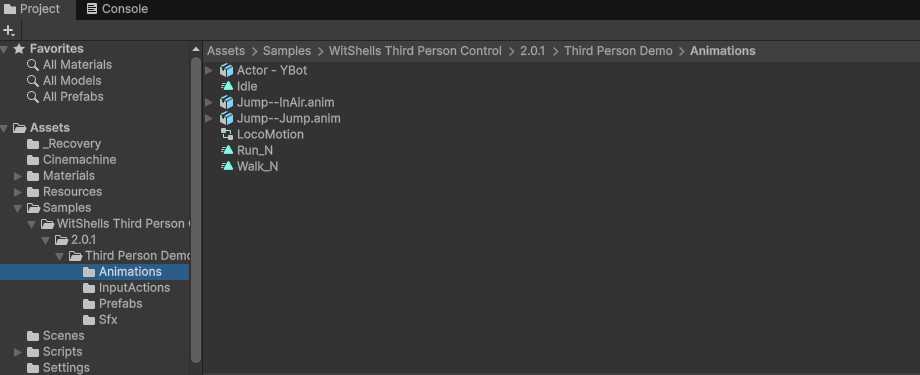
- Double-click LocoMotion to open the Animator window.
- Some animation clip slots may be empty (“Missing” or “None”). Assign the correct clips from the sample folder into each slot.
6. Test It
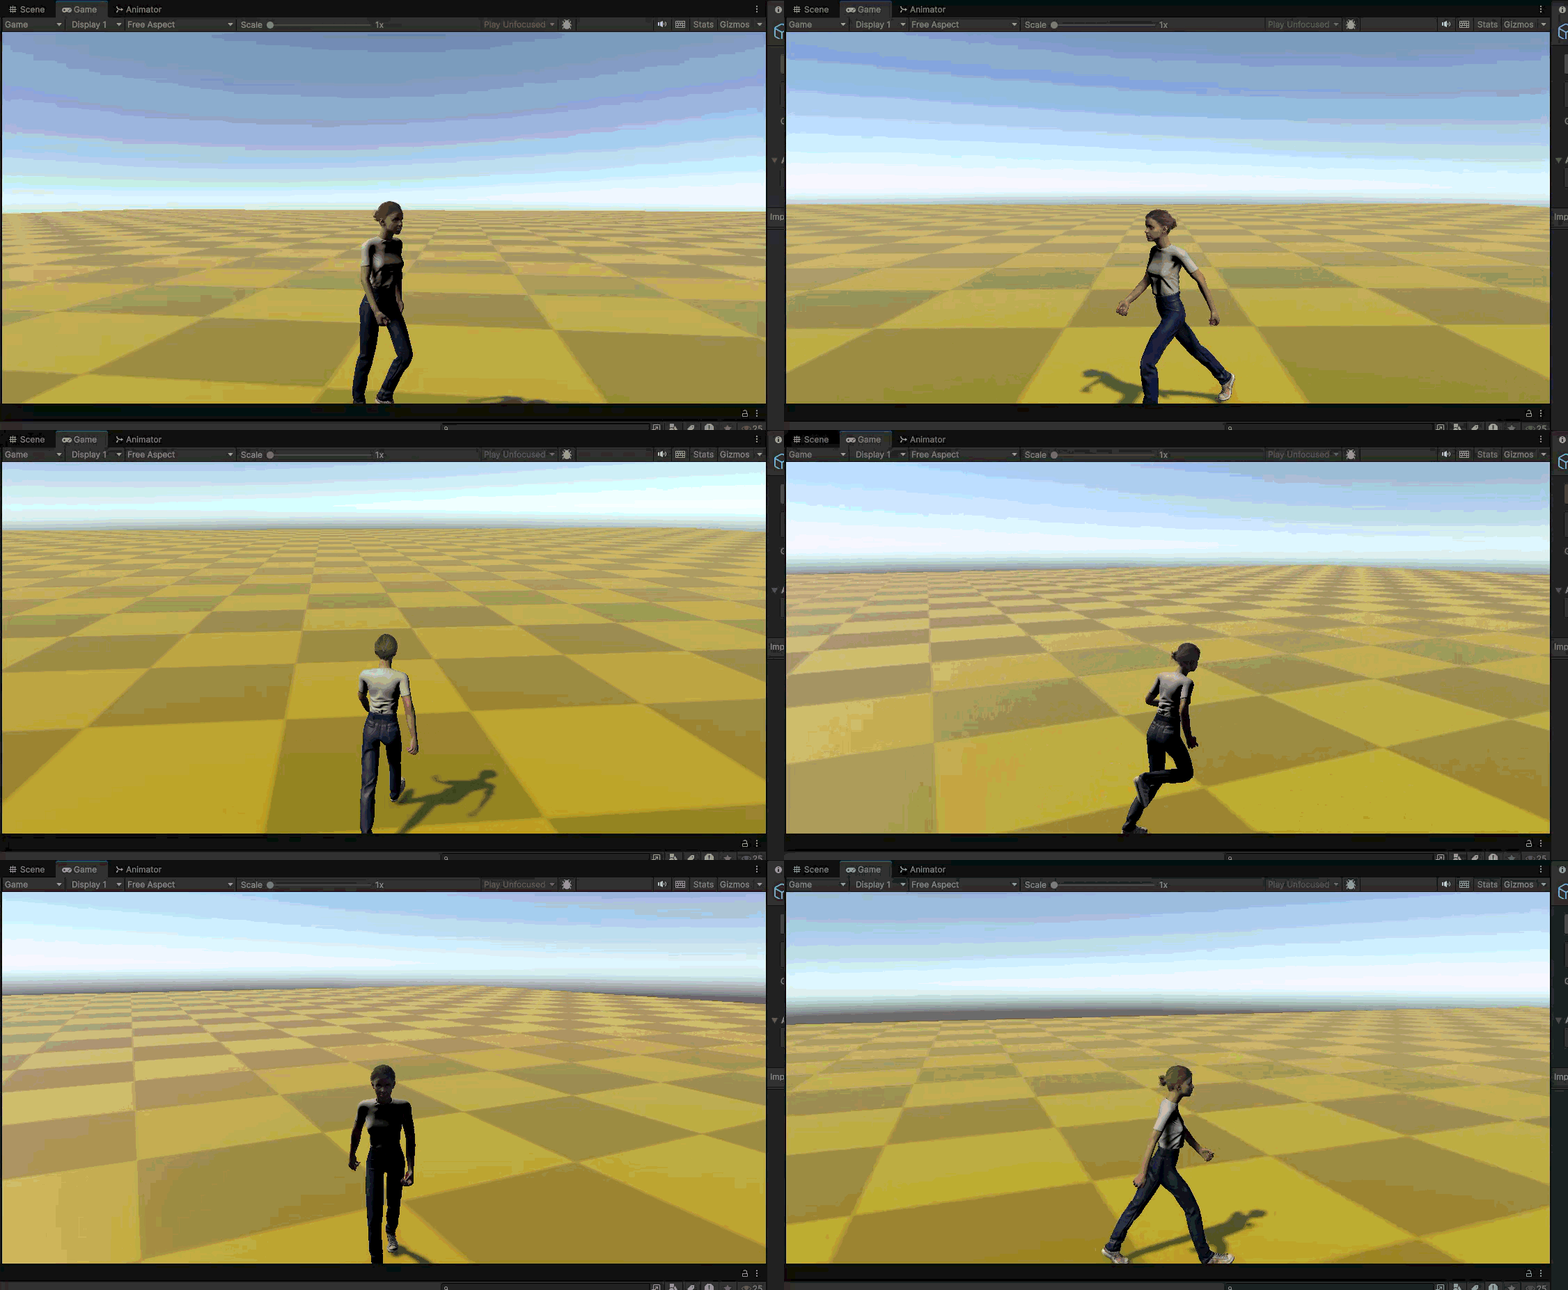
Press Play, and walk your character around the scene with WASD or the arrow keys. You should see smooth movement, a working third-person camera, and matching animations.
7. A Quick Look Under the Hood
You don’t need to understand every script to use the package, but here is a short, simple overview, in case you’re curious or want to extend it later:
- Third Person Controller script — handles the character’s movement and animation. This is the “body.”
- Third Person Input script — reads player input (keyboard, controller) and sends it to the controller above. It is kept as a separate script on purpose. This means you could later write a different script — for example, an AI script — that sends input to the same controller, without touching the movement code at all.
- Third Person Settings — a ScriptableObject that stores tunable numbers, like move speed, look sensitivity, and pitch limits. Keeping settings in one place makes it easy to create different presets (for example, a “fast” character and a “slow, heavy” character) without duplicating code.
- Sound FX Object — handles footstep and landing sounds. These are triggered by an Animation Event Handler, a script with methods that fire automatically when playback reaches a specific frame you marked inside the animation clip.
- Cinemachine Camera Look Input — a small script on the ThirdPersonCamera object. It reads look input (like mouse movement) and rotates the
camera-targetchild object we talked about earlier — this is the same idea as the Pan Tilt rotation control you learned about in Step 4, just wired up for you. The settings asset controls how far up and down the camera can pitch (minimum and maximum), plus look speed and sensitivity.
And that’s the full picture — from installing Cinemachine, to understanding how it really works, to a complete, working third-person character. Take your time experimenting with the Position Control and Rotation Control settings; that’s the best way to build a feel for how each one behaves.
If you have any questions, feel free to reach out on my WhatsApp.
Contracted by NextSkill a Gamestorms company, delivering this course for Isra University